
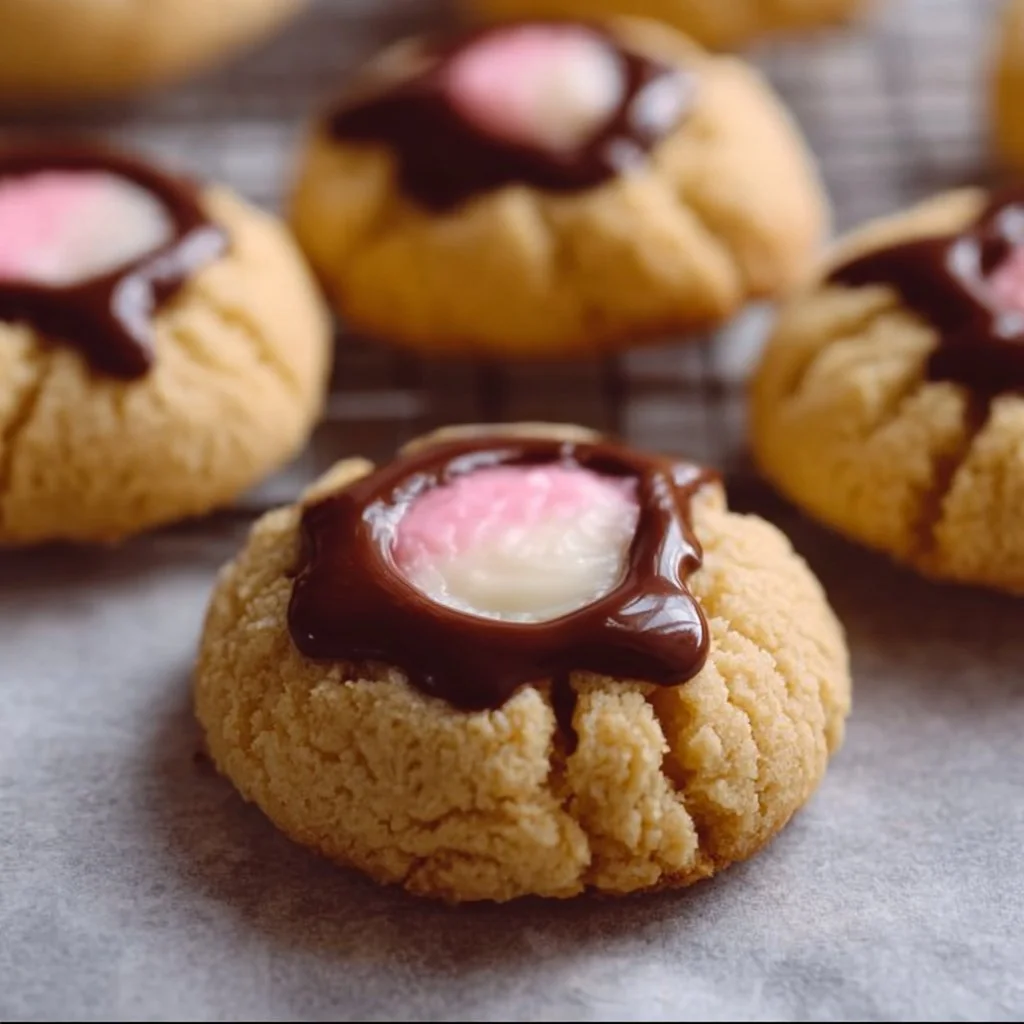
Thumbprint Cookies with Icing Filling are a delightful treat that combines a buttery, soft cookie with a sweet icing. They’re great for any occasion, from holiday celebrations to casual get-togethers. The iconic thumbprint creates the perfect little well for your icing or jam filling, making each bite a flavorful surprise. Plus, they are easy to make and can be customized with different colors of icing to suit any theme or event!
how to make Thumbprint Cookies With Icing Filling
Ingredients:
- 1/3 cup granulated sugar (plus more for rolling)
- 1 stick unsalted butter (8 oz or 115 g, room temperature)
- 1 tsp vanilla extract
- ¼ tsp salt
- 1 large egg yolk
- 1 ¼ cups all-purpose flour (150 grams, weighed or spooned and leveled)
- 1 cup powdered sugar
- 1 tablespoon milk (any type)
- 1/2 tsp vanilla extract (optional)
- Gel food coloring (optional)
Directions:
- Preheat the oven to 325 ℉. Line a baking sheet with parchment paper or a silicone baking mat. Set it aside.
- In a large bowl, using a hand-held mixer or a standing mixer with a beater attachment, cream together the softened butter and granulated sugar until light and creamy, about 2-3 minutes.
- Mix in the egg yolk, salt, and vanilla extract until well combined.
- Add the flour and mix until just combined. Be careful not to overmix the cookie dough.
- Using an ice cream scoop or a large spoon, scoop about 1.5 tablespoon balls of dough and roll them in your hands until a uniform ball forms.
- If desired, roll each ball in more granulated sugar.
- Place the balls of dough on the prepared baking sheet, keeping them about 2 inches apart. Using your thumb, finger, or the back of a 1/2 teaspoon, gently press down in the middle of each ball of cookie dough.
- If the dough cracks, gently press the cookie back together with your fingers.
- Bake in the preheated oven until the cookies just start to brown, about 12-15 minutes.
- Remove the cookies from the oven and let them cool on the baking sheet for 5-10 minutes. Transfer the cookies to a cooling rack to cool completely before filling with icing.
Icing
To make the icing, mix the powdered sugar, milk, and optional vanilla extract in a bowl until smooth. If you want colored icing, add a few drops of gel food coloring until you achieve the desired color.
how to serve Thumbprint Cookies With Icing Filling
Once the cookies are completely cooled, fill each thumbprint with icing. You can use a piping bag for more control, or simply spoon the icing into the wells. Serve them on a plate for everyone to enjoy!
how to store Thumbprint Cookies With Icing Filling
Store the thumbprint cookies in an airtight container at room temperature for up to a week. If you want to keep them fresh longer, you can freeze them without the icing for up to three months.
tips to make Thumbprint Cookies With Icing Filling
- Make sure your butter is at room temperature for easy mixing.
- Don’t skip rolling the dough balls in granulated sugar for extra sweetness and a lovely texture.
- If you notice the dough is too soft, refrigerate it for 15-30 minutes before shaping and baking.
variation
You can fill the thumbprints with jam or chocolate instead of icing for a fruity or chocolatey twist. You can also experiment with different flavor extracts in the icing for additional flavors.
FAQs
Q: Can I make these cookies gluten-free?
A: Yes! You can use a gluten-free flour blend instead of all-purpose flour.
Q: How can I make the icing thicker?
A: Simply add more powdered sugar to the icing mixture until you reach the desired thickness.
Q: Can I use margarine instead of butter?
A: Yes, margarine can be used, but it may slightly affect the taste and texture of the cookies.
Thumbprint Cookies With Icing Filling
Ingredients
Equipment
Method
- Cream together softened butter and granulated sugar until light and fluffy in a large bowl, then beat in the egg yolk and vanilla extract.
- Gradually add flour and salt to the wet mixture, mixing until a soft dough forms; chill the dough for at least 30 minutes to firm it up.
- Preheat your oven to 375°F (190°C) and prepare baking sheets with parchment paper.
- Roll dough into 1-inch balls, dip each into the whisked egg white, then roll in chopped nuts if using.
- Place balls on prepared baking sheets, make an indentation in the center of each with your thumb, and bake for 10-12 minutes until edges are lightly golden.
- While cookies cool, whisk powdered sugar, milk, and vanilla extract for the icing; add food coloring if desired.
- Once cookies are completely cool, spoon or pipe the prepared icing into the thumbprint indentations.