
Why Make This Recipe
Chocolate mousse is a delightful dessert that brings joy to anyone who enjoys chocolate. This no-egg version is perfect for those with egg allergies or anyone looking for a lighter, creamier treat without compromising on flavor. It’s easy to prepare, making it great for both special occasions and casual gatherings. Plus, the ingredients are simple and you probably have most of them in your kitchen!
How to Make Chocolate Mousse
Ingredients:
- 4 oz semi-sweet chocolate baking bar
- 1 tsp cocoa powder, Dutch processed
- 60 ml (1/4 c) water
- 1/2 tsp vanilla
- 237 ml (1 c) heavy cream
- 12 g (1 Tbs) granulated sugar
- Pinch of table salt (or 1/8 tsp kosher salt if you don’t have table)
- Whipped cream, chocolate shavings, and caramel for garnish (optional)
Directions:
- Begin by breaking the chocolate baking bar into small pieces and place it in a heatproof bowl.
- In a small saucepan, combine the cocoa powder and water. Heat over low heat until the cocoa is dissolved, stirring frequently.
- Pour the warm cocoa mixture over the chocolate pieces and stir until the chocolate is completely melted and smooth.
- Add the vanilla and a pinch of salt to the chocolate mixture, stirring well to combine.
- In a separate bowl, whip the heavy cream with granulated sugar until soft peaks form.
- Gently fold a third of the whipped cream into the melted chocolate mixture until combined.
- Then, fold in the remaining whipped cream until fully incorporated. Be careful not to deflate the mixture too much.
- Spoon the mousse into serving dishes or glasses. Chill in the refrigerator for at least 2 hours before serving.
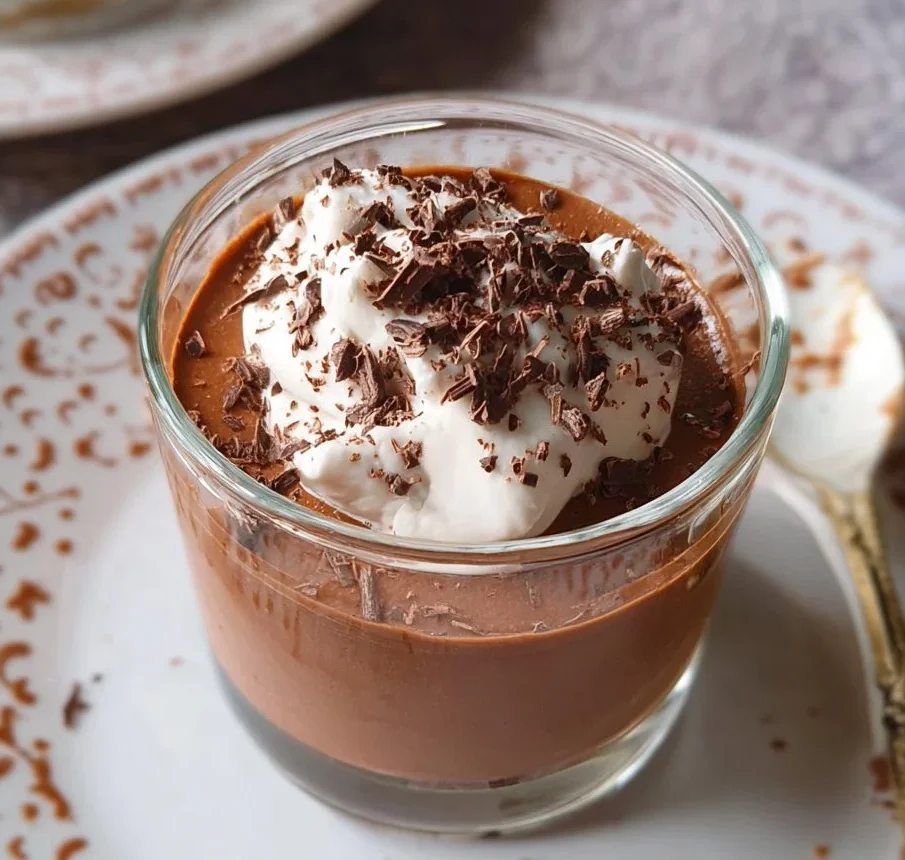
How to Serve Chocolate Mousse
Serve the chocolate mousse chilled and topped with a dollop of whipped cream, a sprinkle of chocolate shavings, and a drizzle of caramel for an extra touch. It looks beautiful and tastes even better!
How to Store Chocolate Mousse
Chocolate mousse can be stored in the refrigerator for up to three days. Make sure to keep it covered to prevent it from absorbing any odors from the fridge.
Tips to Make Chocolate Mousse
- Use high-quality chocolate for the best flavor.
- Be gentle when folding the whipped cream into the chocolate to keep the mousse light and airy.
- If you want an even richer flavor, you can add a pinch of espresso powder to enhance the chocolate.
Variation
For a different flavor, try adding a splash of orange or peppermint extract to the chocolate mixture. You can also mix in crushed nuts or berries before chilling for added texture and flavor.
FAQs
Can I make chocolate mousse ahead of time?
Yes, chocolate mousse can be made a day in advance and kept in the refrigerator until you are ready to serve.
Is this chocolate mousse suitable for vegans?
This recipe contains dairy, so it is not vegan. However, you can substitute the heavy cream with a non-dairy alternative to create a vegan version.
Can I use chocolate chips instead of a baking bar?
Yes, chocolate chips can be used in place of a baking bar. Just be aware that the texture might be slightly different. Make sure to choose high-quality chocolate chips for the best results.
Chocolate Mousse (No Eggs)
Ingredients
Equipment
Method
- Gently melt the chopped dark chocolate and let it cool slightly.
- In a chilled bowl, whip the cold heavy cream with powdered sugar and vanilla extract until stiff peaks form.
- Carefully fold the cooled melted chocolate into the whipped cream until just combined, avoiding deflation.
- Divide the mousse into serving glasses and chill for at least 2-4 hours, or until set, before serving.